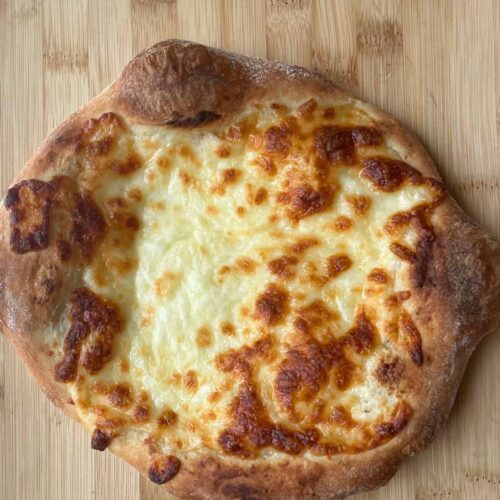
The best homemade pizza dough for your personal pizza (8-9 inch). Even with a short rise, it results in an airy, light, bubbly, and crunchy crust. This dough requires no kneading by hand, thanks to the high hydration. Once you try it, you won’t go back to dense pizza crust.
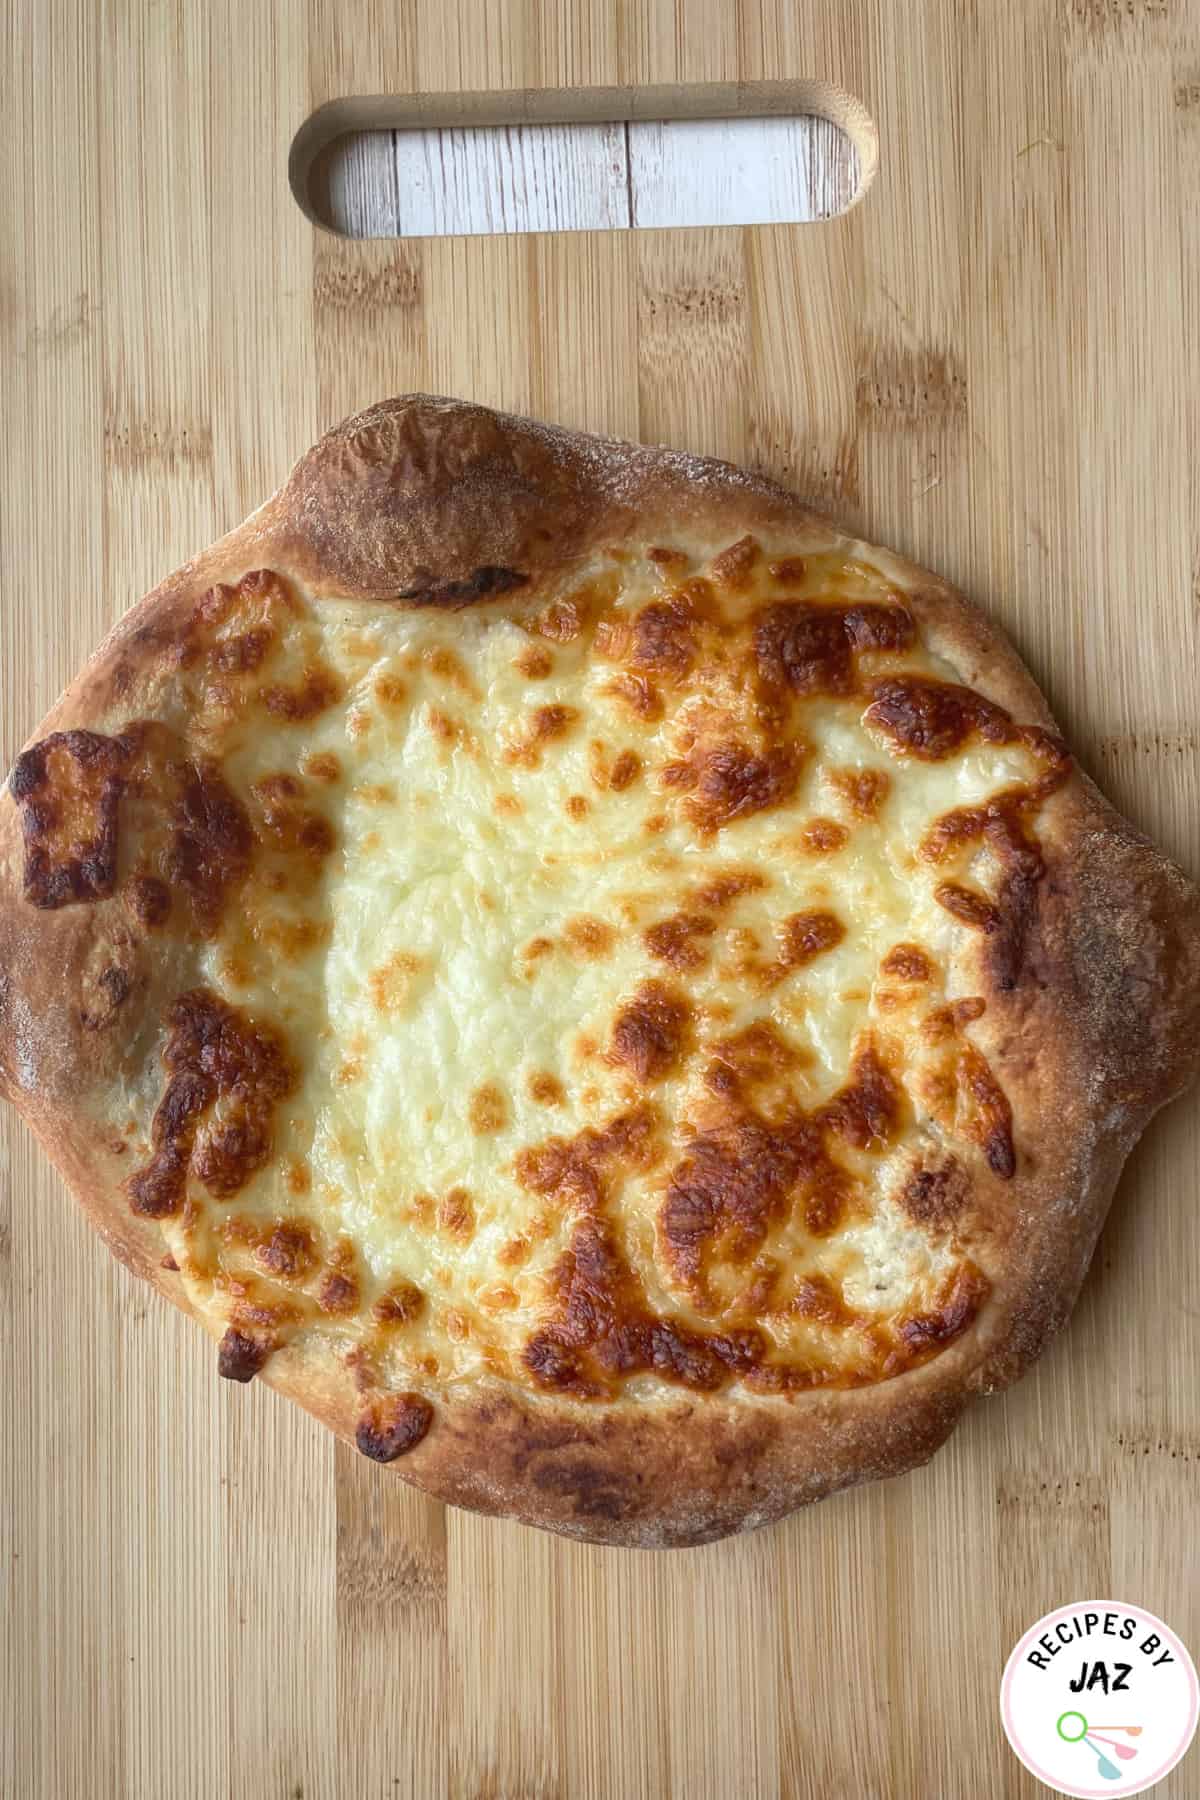
If you’re on your own or making a smaller pizza for the kids, this personal-size pizza recipe is perfect. It’s a variation of my original pizza dough recipe (coming soon), using 84% hydration of the dough.
Hydration refers to the amount of water used in a recipe relative to the amount of flour. Higher hydration results in an airy and light crust. This recipe yields an 8- to 9-inch pizza, depending on the thickness of the crust.
Perfect airy pizza crust
I love the cold fermentation of pizza dough and the flavor it brings, but pizza cravings don’t always stick to a schedule. This pizza dough gives a beautiful crust even with a short rise time, thanks to the high hydration.
We let it rise for 45 minutes, then fold and ball the dough, followed by a 30-minute rest before shaping. Trust me, just 75 minutes of total rise and rest will give you one of the best crusts ever. You’ll forget about the flat, dense crusts of short-rise pizzas.
No worries, if you change your mind, simply place the dough in the refrigerator for up to 5 days and make it later when needed. The slow cold fermentation can add even more flavor to the pizza dough.
Ingredients
- Water: Warm water between 100 to 110°F. Do not use hot water or it will destroy the yeast. Make sure to use warm water or your dough won’t rise fast.
- Flour: You can use either all-purpose flour or bread flour. Bread flour is much easier to handle with higher hydration, so preferably use that, but all-purpose flour also works; it just requires a little more gentle handling compared to bread flour. Bread flour will also give you a chewier texture. Additionally, bread flour is stronger because it has a higher protein content, so it can hold air bubbles more efficiently.
- Yeast: I am using instant yeast here, but you can use the same amount of active dry yeast.
- Salt: Regular table salt.
- Sugar: To help in the fast rise and also for the browning of the crust.
- Olive oil
- Garlic powder (optional): I almost always add garlic to my pizza crust. It adds a beautiful flavor to the crust.
- Other herbs (optional): You can also add other herbs such as basil as per your preference.
How to make pizza dough
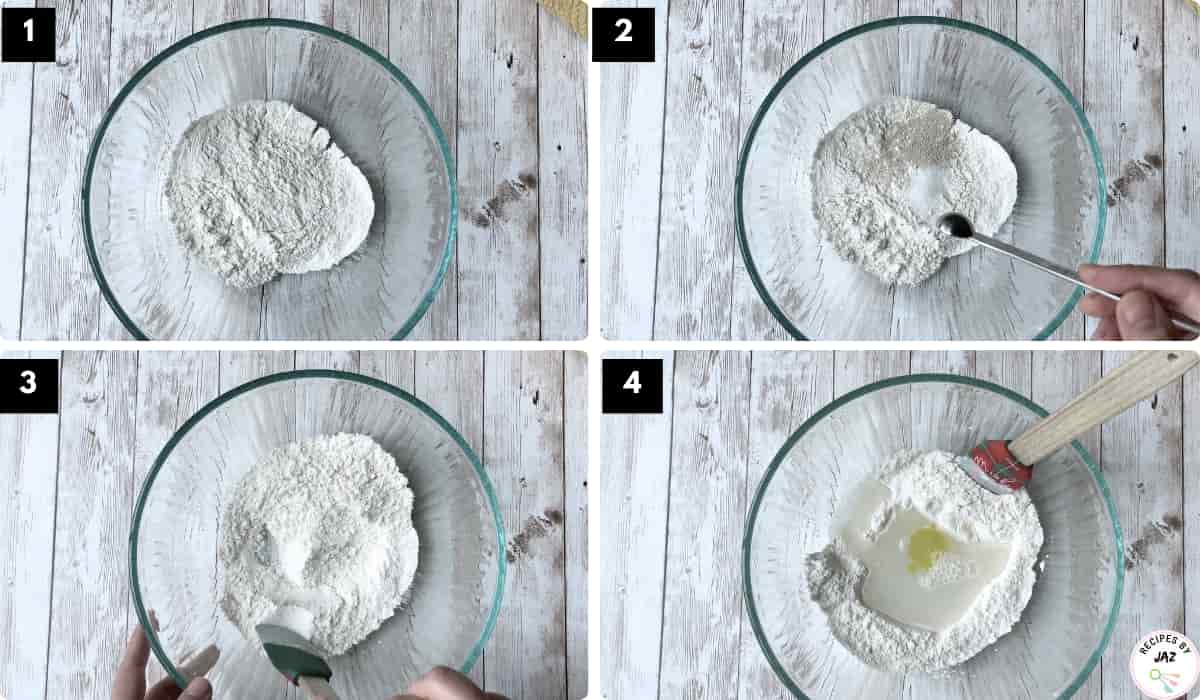
- Add flour to a mixing bowl.
- Then add yeast, sugar, salt, and garlic powder.
- Combine the dry ingredients.
- Make a well in the center of the dry mixed ingredients. Add water and olive oil.
- Combine all ingredients using a spatula until they form a rough dough ball.
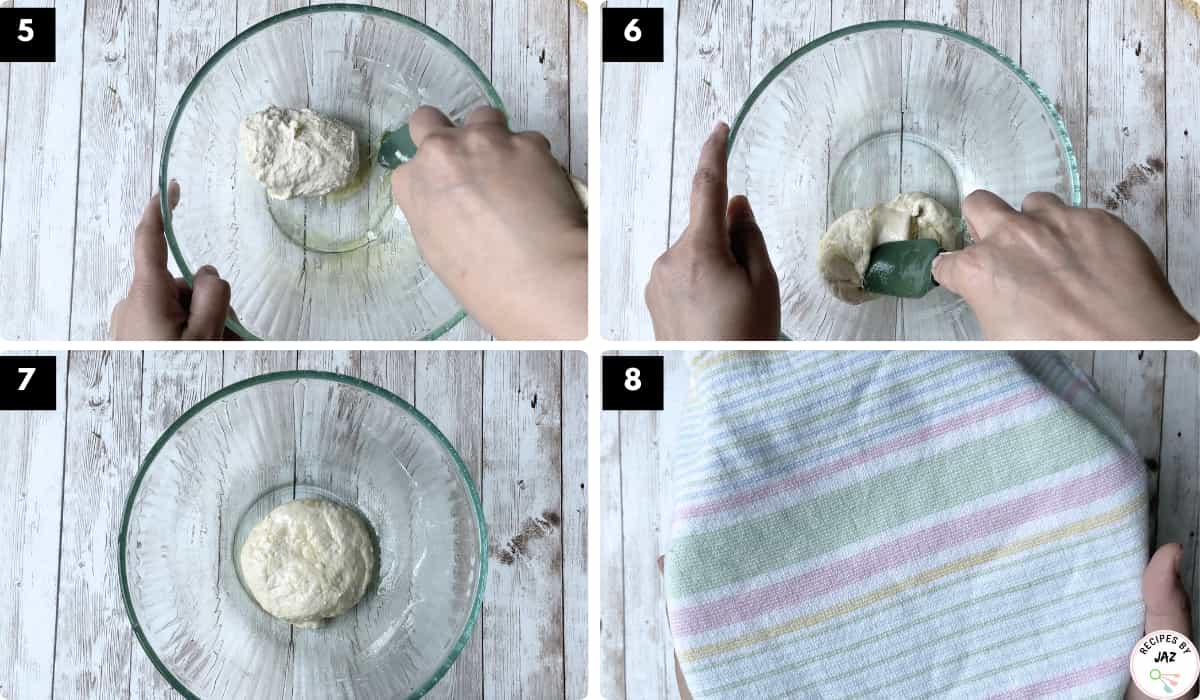
- Coat the dough ball with oil and fold it with a spatula.
- If necessary, add more oil to the surface of the dough ball.
- Cover the dough and allow it to rise in a warm spot for at least 45 minutes. The dough won’t rise quickly enough if it’s not placed in a warm environment. One method I usually use is preheating my oven toaster to 475°F for 40-60 seconds, then switching it off and placing the dough inside. This creates a warm and draft-free environment perfect for encouraging dough rising.
- Your dough will double in size during these 45 minutes.
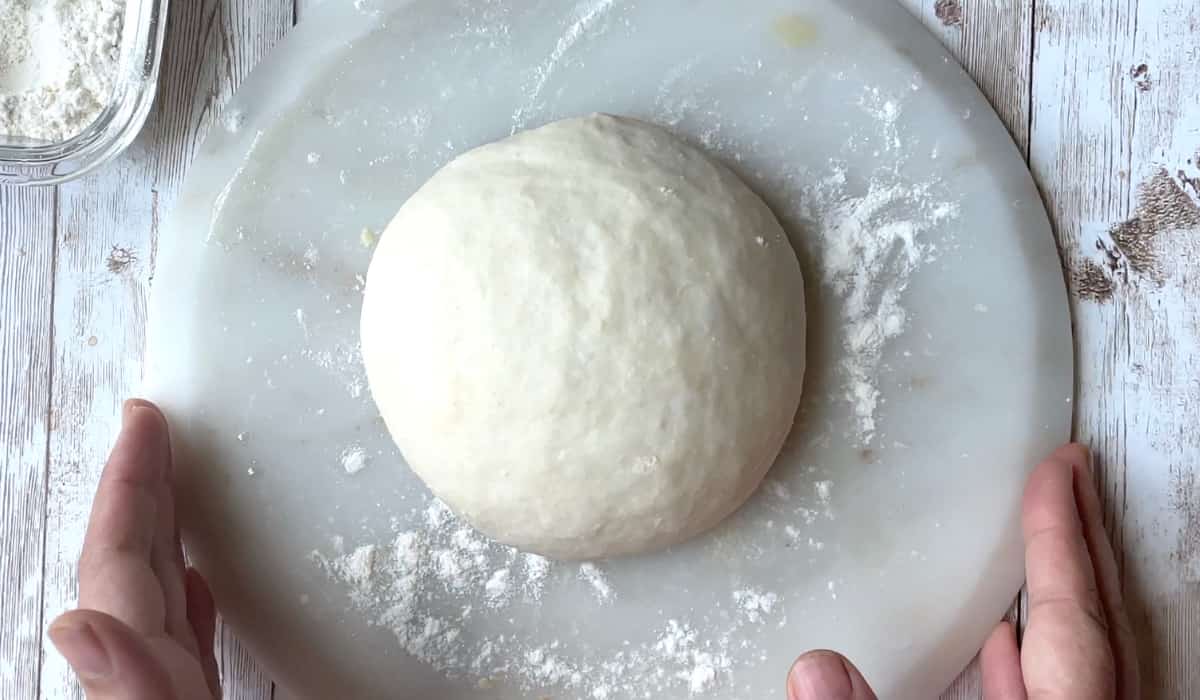
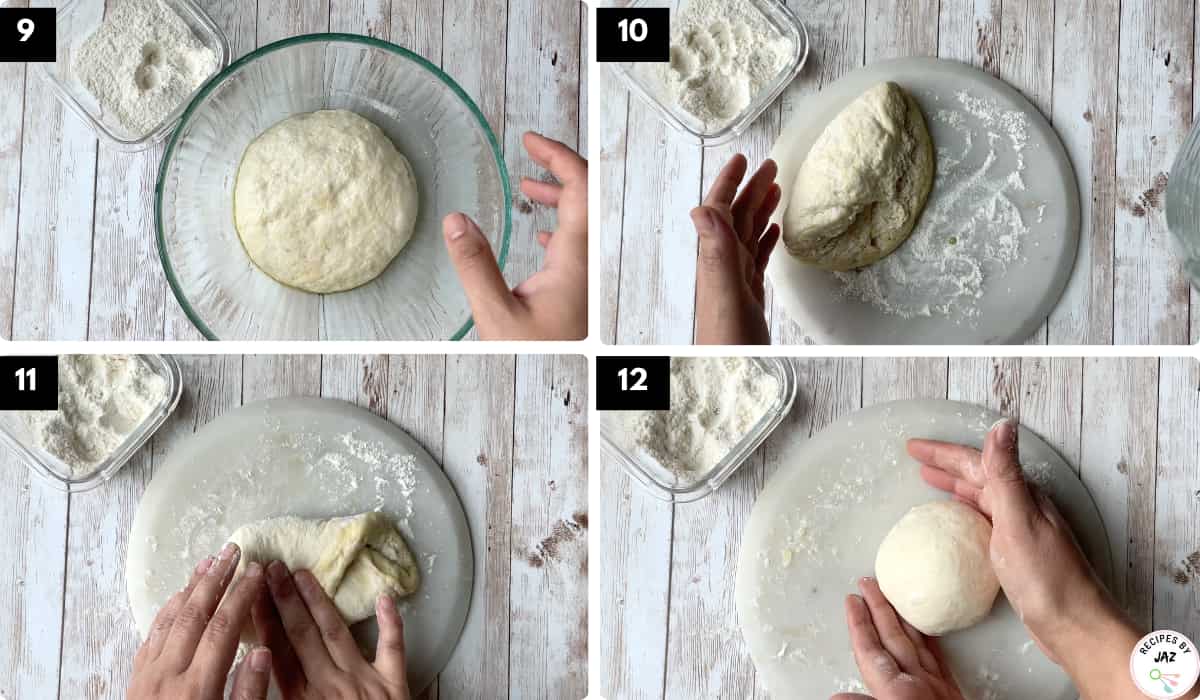
- Next, transfer the dough to a well-floured surface.
- Fold the dough from all four directions. Turn the seam side down. (See the recipe video to see how to fold.)
- Then, use your hands to shape it into a smooth, tight dough ball by pinching the dough in the center underneath with the edges of your hands. (Alternatively, hold the dough ball with the seam side up and pinch it to make a compact dough ball.)
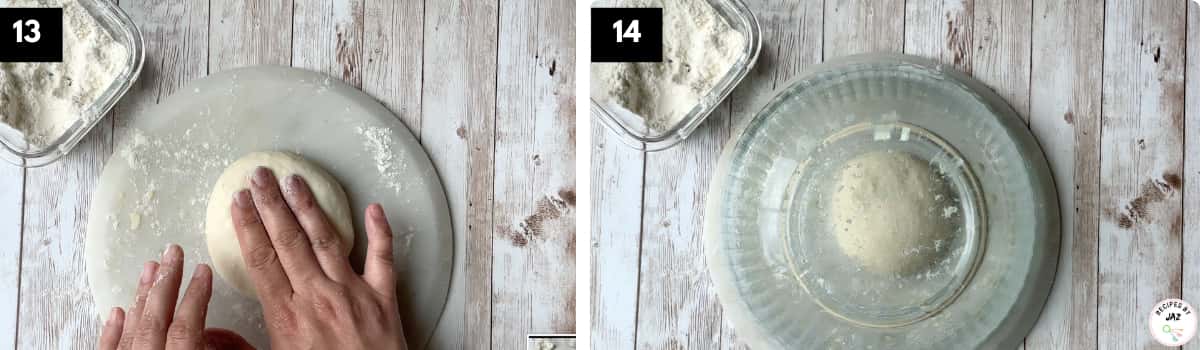
- Gently press on the surface to shape the dough ball into a disc.
- Cover the dough with the same bowl (turn the bowl upside down) and let it rest for 30 minutes.
How to make/shape pizza crust
The next step is shaping the pizza crust. Before shaping the pizza, preheat your oven.
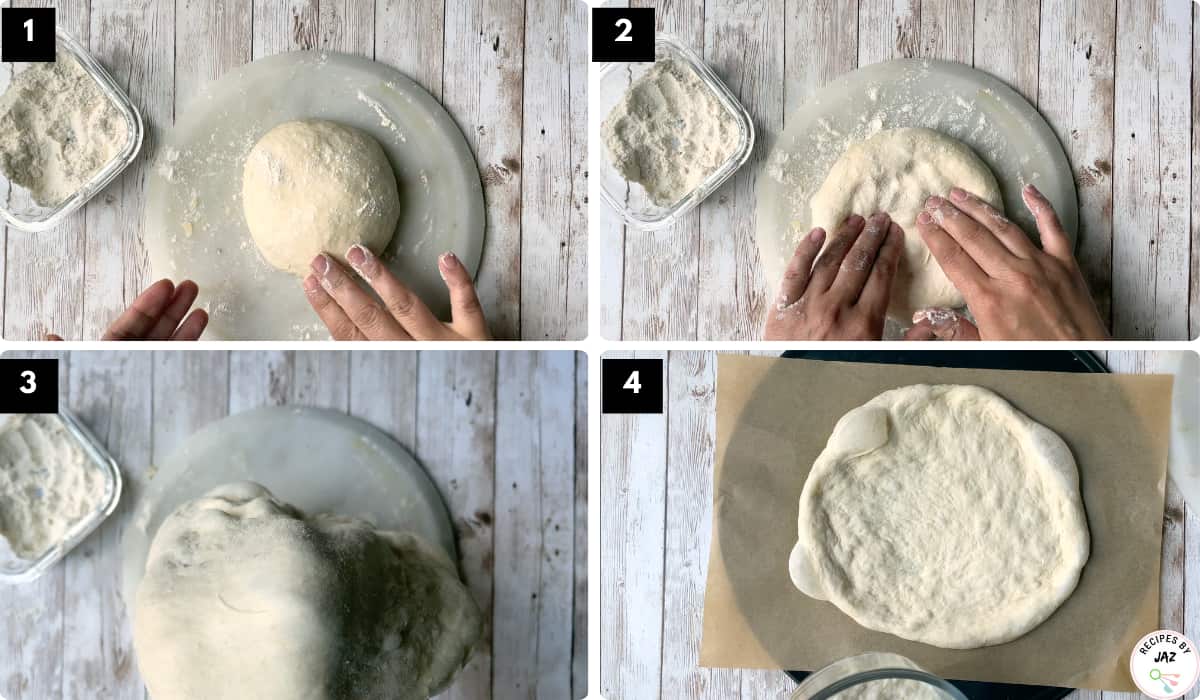
- Uncover the dough ball. Sprinkle some all-purpose flour or semolina on both the top and underside of the dough ball.
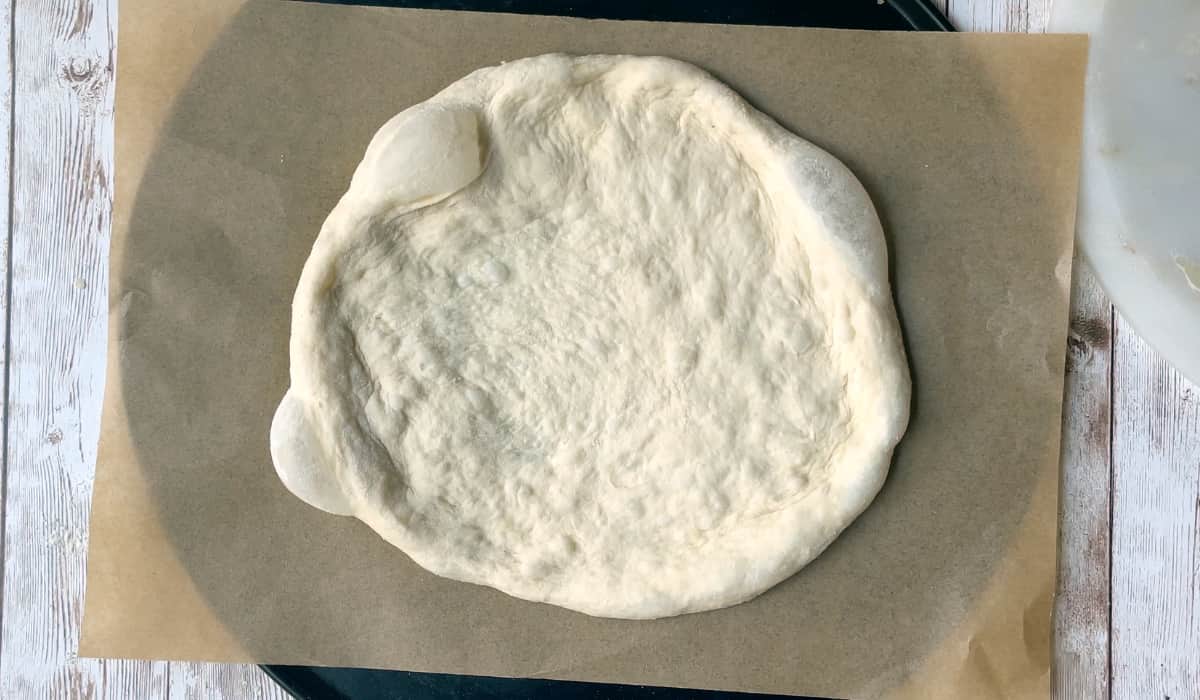
- Gently press in the center to start stretching the pizza, being careful to avoid tearing or removing all the air. (Do not use a rolling pin)
- After the initial stretching, hold the dough about an inch from the edge and rotate it on your knuckles. This dough has high hydration, so it will stretch with minimal effort. Be very gentle when stretching if you are using all-purpose flour.
- Once stretched, place the shaped dough on the parchment paper. Give it a final stretch either while transferring it to the parchment paper or after transferring it while it lays on it.
Baking pizza
How you bake the pizza depends on your oven and the desired crust texture—whether soft or crispy with browned edges.
If your oven can reach 500°F or above
Use the higher temperature and reduce the cooking time accordingly (usually 5-6 minutes if baking at 550°F). You will probably not need par-baking. The high heat can produce a beautiful crispy crust in a shorter amount of time.
If baking in an oven that reaches a lower temperature, or in a toaster oven
My oven toaster reaches a maximum of 480°F, but it preheats super fast, so I bake most of the small/medium pizzas in it. I usually bake them at 475°F, and depending on who the pizza is for, I bake it differently: par-baking if it’s for me and hubby (we like crispy crust), and no par-baking if it’s for the kids.
a) For an extra crispy crust (with par-baking)
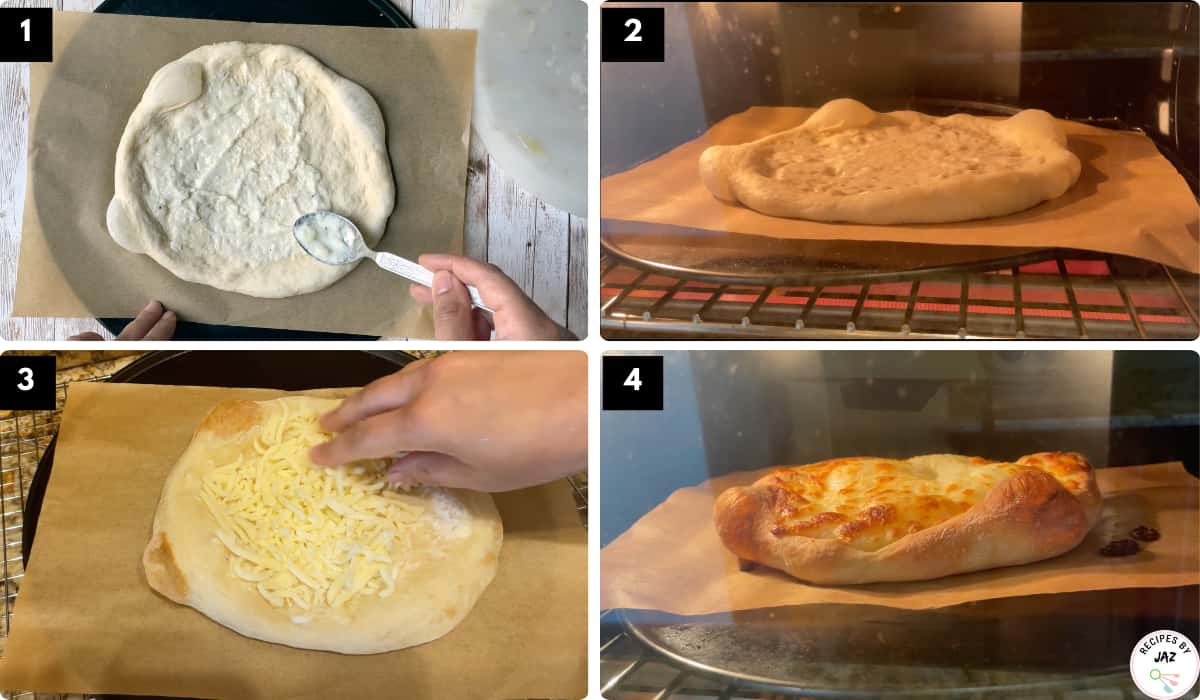
- Add half of the total or more pizza sauce. (If you like white pizza, you can check out this white pizza sauce recipe.)
- Par-bake at 475°F: The parbake time will depend on the toppings and cheese you use. Shredded cheese melts faster compared to large chunks, so adjust accordingly. In some cases, you might not need parbaking. When I use shredded cheese, I typically use these timings: 1.5 to 2 minutes if I am using many toppings, and 3 minutes if using fewer toppings or making a simple cheese pizza. (You’ll notice faint brown spots on the parbaked crust.)
- Then remove from the oven, and add more pizza sauce if needed and toppings.
- Bake for an additional 7-8 minutes or more if using many toppings.
b) For a soft crust with crispy edges (no par-baking)
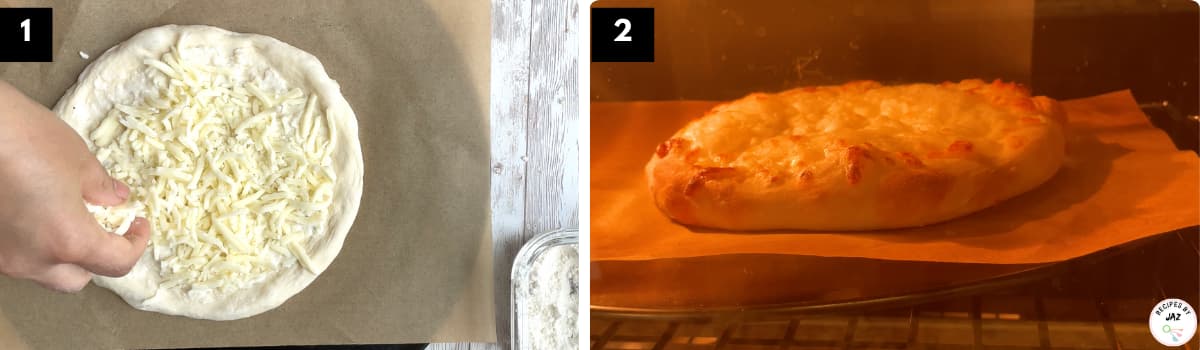
- Add the sauce and toppings
- Bake at 475°F for 8 minutes or more if using many toppings.
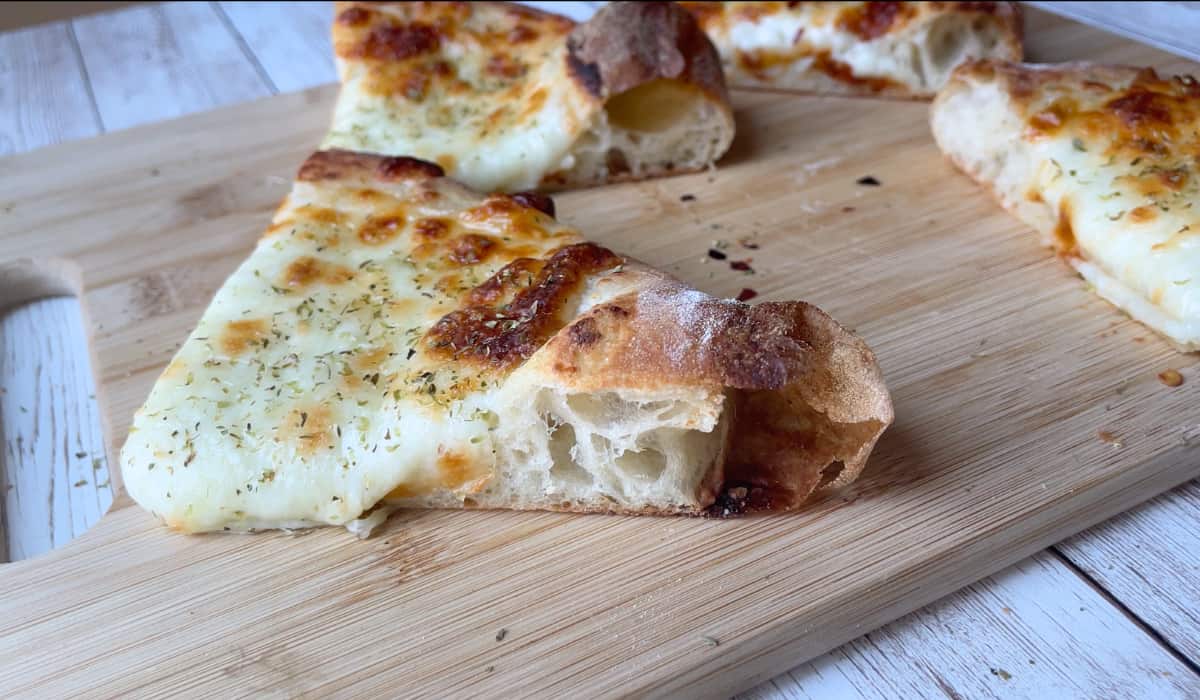
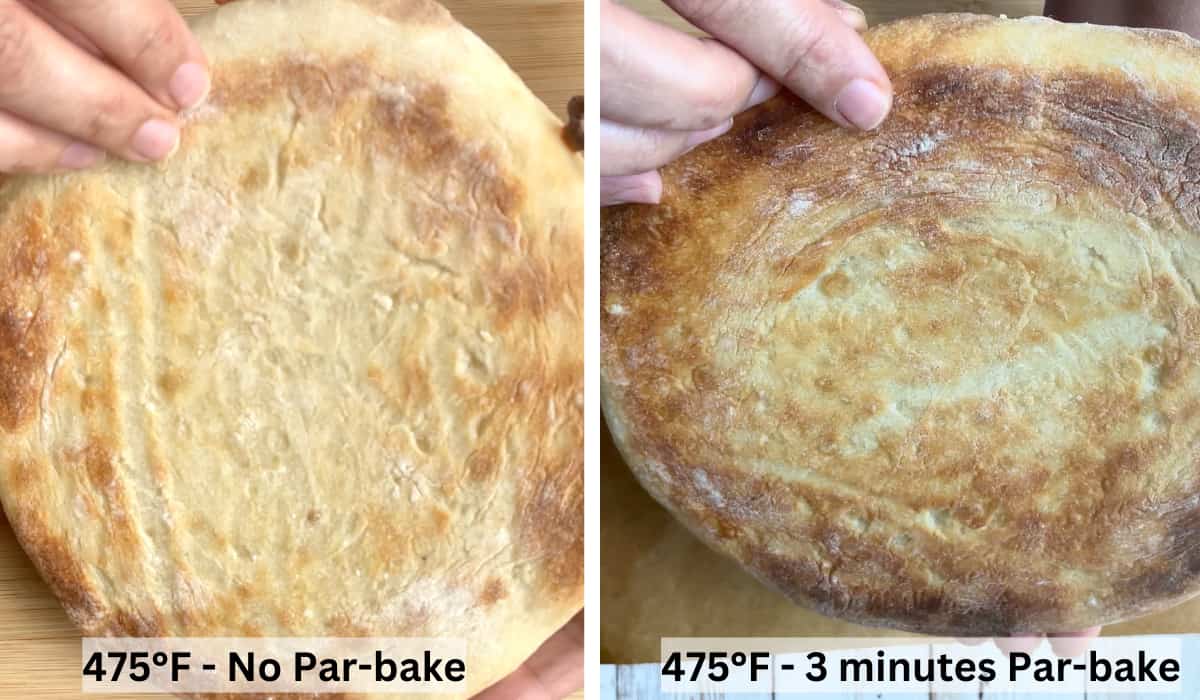
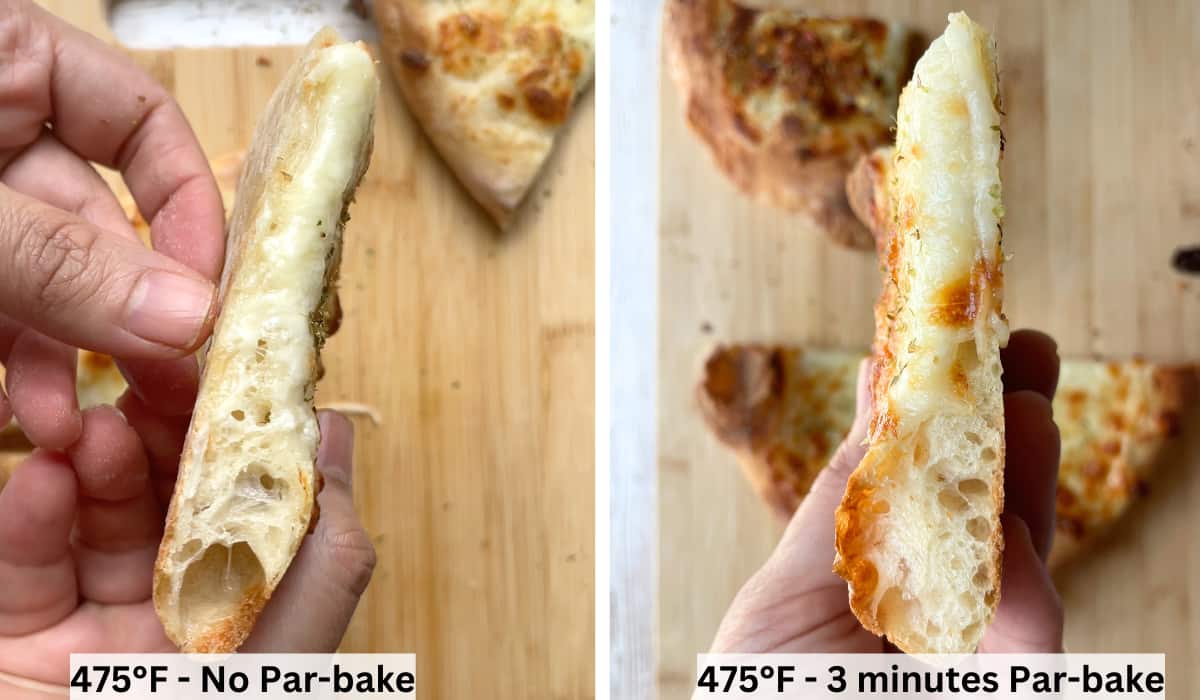
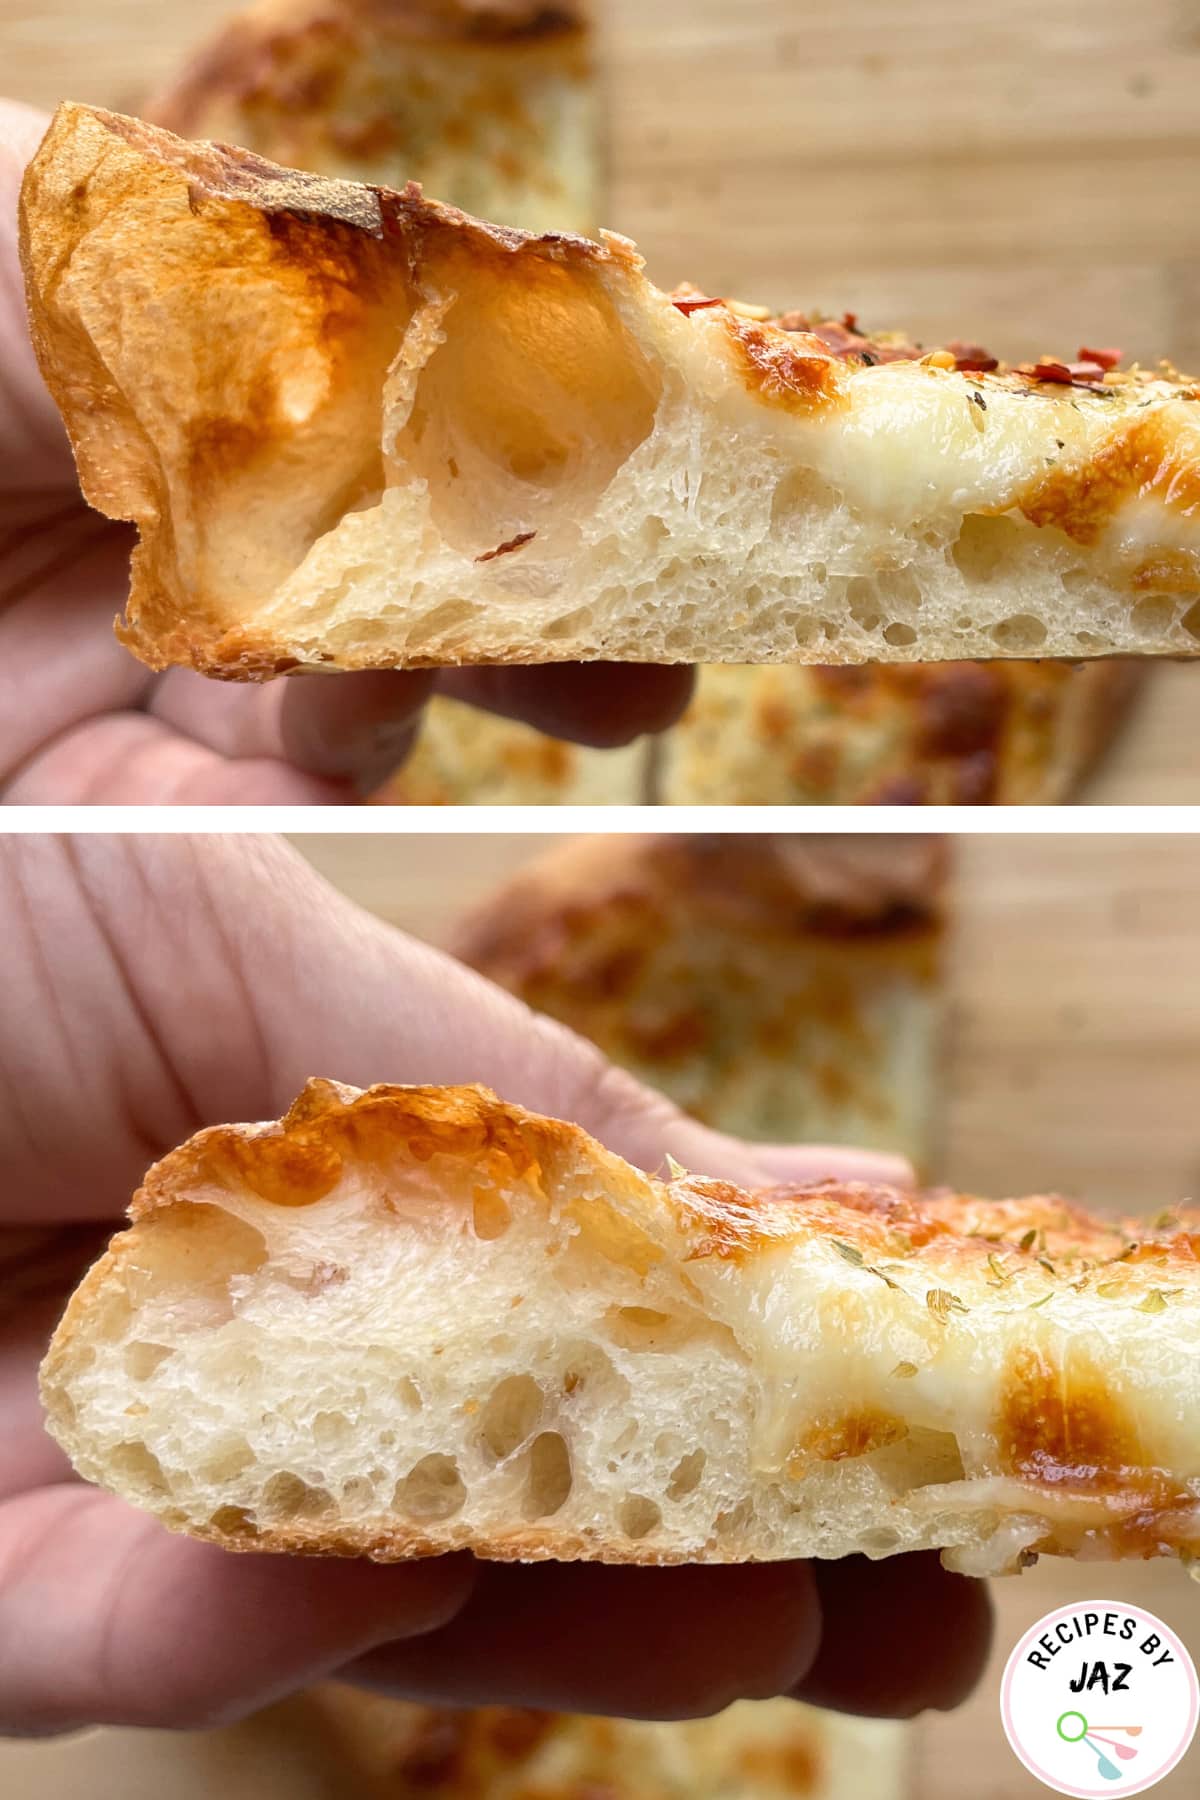
Note: The pictures below show the difference you get by par-baking if your oven doesn’t reach a higher temperature. Both pizzas will have an airy, light crust; the only difference is in the crispiness or crunchiness of the crust. If you prefer a crispy crust, it’s best to bake above 500°F, or you can try par-baking if baking at a lower temperature.
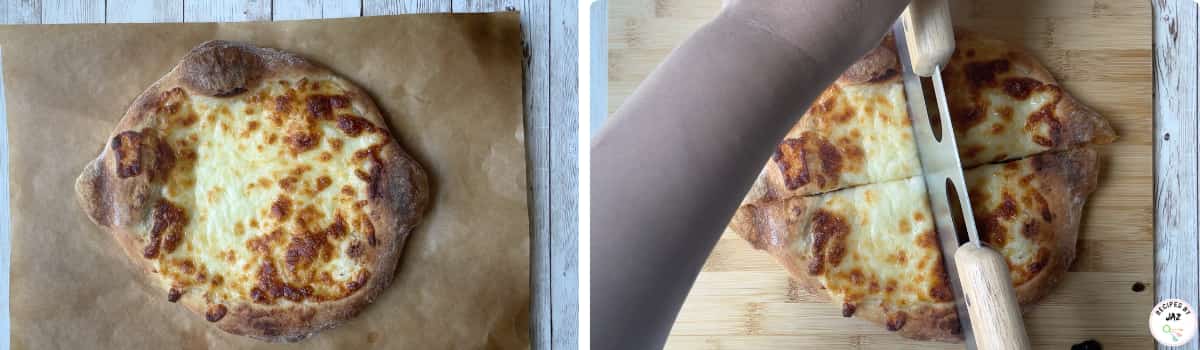
Final step
Slice, add seasoning if you wish, and enjoy!!
Success tips
- Use warm-temperature water when making dough, no more than 110°F.
- Keep the dough in a warm area, or your dough will not rise.
- Measure the flour by spooning and leveling (meaning fill the cup with a spoon and level it off the straight edge of a knife) or even better, measure on a scale.
- Don’t try to make the pizza dough rise by adding too much yeast. It can result in a very sour taste of the crust.
- Important: When making pizza, preheat the oven before you start shaping the dough. Once the dough is shaped, add the toppings immediately and place it in the oven. Make sure to prepare the sauce and toppings before you start shaping the pizza dough.
- Do not use a rolling pin to shape this pizza or you’ll knock out all the air.
- For a crispy crust, it’s best to bake above 500°F, or you can par-bake as mentioned above. Using a pizza stone or a pan with holes can also help make the crust more crispy.
- If you want to crisp the crust after the pizza is already made, place it on a hot skillet for 2-4 minutes.
- If using a pizza stone, make sure to preheat it for 30 minutes to 1 hour at 475°F or higher.
- Special tips for beginners:
- If you can get your hands on bread flour, use that instead of all-purpose flour. It can absorb more liquid, making the dough handling much easier.
- Don’t hesitate to use dry flour on the work surface for dusting; you need it to make high-hydration dough work.
- Use parchment paper to avoid the dough sticking to the pizza steel. Transfer the shaped pizza dough with the parchment paper to the pizza stone.
Reheating pizza
- Place a skillet over the stove on medium-high heat.
- First, heat the pizza in the microwave for 30-60 seconds or longer depending on whether the pizza is stored on the counter or in the refrigerator.
- Then place the pizza on the hot skillet to crisp the crust.
- Alternatively, you can reheat the pizza in the oven at 475°F or higher for around 2-4 minutes.
Storage and make-ahead
Dough in the refrigerator
If your plans change and you’re unable to make the pizza immediately, let the dough rise for the initial 45 minutes to 1 hour, then do the folds to shape it into a smooth dough ball. Transfer the dough ball back into the bowl, coat it with some olive oil, and cover with a lid. Place the bowl in the refrigerator, where it can be stored for up to 5 days.
When you’re ready to make pizza on another day, remove the dough from the refrigerator an hour before you start. Allow it to rest for at least an hour before shaping and baking.
Dough in the freezer
You can also freeze the dough. To make pizza from frozen dough, thaw it in the fridge overnight and take it out of the fridge an hour before making it, or thaw it at room temperature for 6-8 hours.
Par-baking to freeze crust
You can also par-bake the pizza crust and freeze it. To par-bake, bake the pizza crust (without sauce) for 2 minutes at 475°F or higher (if your oven goes higher). Place it on a cooling rack and then wrap it. It can be stored in the freezer for up to 3 months.
To use, thaw the crust in the fridge for 6-8 hours or on the counter for around 2 hours before adding toppings and baking.
Personal-size pizza dough recipe for one
Video

Ingredients
- 3/4 cup bread flour (preferably) or all-purpose flour (plus more for dusting, see note 2)
- 1/3 cup warm water (for beginners and if using all-purpose flour, remove 1 teaspoon of water from the total to reduce hydration to 79%)
- 3/8 teaspoon instant yeast (See note 3)
- 3/8 teaspoon sugar
- 1/4 teaspoon salt
- 1-2 teaspoons olive oil (divided, 1/2 teaspoon while mixing dough and rest for coating the dough ball)
- 1 pinch garlic powder (optional)
Instructions
To make pizza dough
- Add flour, yeast, sugar, salt, and garlic powder to a mixing bowl.
- Mix all the dry ingredients.
- Make a well in the center of the dry ingredients. Add water and 1/2 teaspoon of olive oil to the well.
- Mix everything to form a rough dough ball.
- Coat the dough ball with the rest of the olive oil. Fold the dough with a spatula 4-5 times.
- Cover the bowl with a cloth or wrap and allow it to rise in a warm spot for at least 45 minutes. The dough won’t rise quickly enough if it’s not placed in a warm environment. One method I usually use is preheating my oven toaster to 475°F for 40-60 seconds, then switching it off and placing the dough inside. This creates a warm environment perfect for encouraging dough rising.
- Once proofed, transfer the dough to a well-floured surface. Fold the dough from all four directions. Turn the seam side down. (See the recipe video to see how to fold.) Then, use your hands to shape it into a smooth, tight dough ball by pinching the dough in the center underneath with the edges of your hands. (Alternatively, hold the dough ball with the seam side up and pinch it to make a compact dough ball). Once done, gently press on the surface to shape it into a disc.
- Cover the dough with the same bowl (turn the bowl upside down) and let it rest for 30 minutes.
To make pizza crust
- Before shaping the pizza, preheat your oven to 475°F or to the highest setting available (the higher, the better for achieving a crispy crust).
- Uncover the dough ball. Sprinkle some all-purpose flour or semolina on both the top and underside of the dough ball.
- Gently press in the center to start stretching the pizza, being careful to avoid tearing or removing all the air. (Do not use a rolling pin)
- After the initial stretching, hold the dough about an inch from the edge and rotate it on your knuckles. This dough has high hydration, so it will stretch with minimal effort. Be very gentle when stretching dough if you are using all-purpose flour.
- Once stretched, place the shaped dough on the parchment paper. Give it a final stretch either while transferring it to the parchment paper or after transferring it while it lays on it.
To bake pizza
- How you bake the pizza depends on your oven and the desired crust texture—whether soft or crispy with browned edges. The exact time will vary on the amount of your toppings.
- If your oven can reach 500°F or above, use the higher temperature and reduce the cooking time accordingly. You will probably not need par-baking. The high heat can produce a beautiful crust in a shorter amount of time. (It usually takes 5-6 minutes if baking at 550°F.)
- Baking at 475°F if your oven does not reach a higher temperatureNote: Both methods will result in an airy and bubbly pizza crust. The only difference is the crispiness you can get with par-baking. There's no need to par-bake if you are already baking at a very high temperature (500°F or above).For a soft crust, add the sauce and toppings and bake at 475°F for 475°F for 8 minutes or more if using many toppings.For a crispy crust, add some pizza sauce and par-bake at 475°F. The par-bake time will depend on the toppings and cheese you use. Shredded cheese melts faster compared to large chunks, so adjust accordingly. In some cases, you might not need parbaking. When I use shredded cheese, I typically use these timings: 1.5 to 2 minutes if I am using many toppings, and 3 minutes if using fewer toppings or making a simple cheese pizza. (You'll notice faint brown spots on the parbaked crust.) Then remove from the oven, add the rest of the sauce and toppings, and bake for an additional 7-8 minutes or more if using many toppings.
Notes
- This recipe works great even with short rise and gives a beautiful crust but longer cold fermentation can further enhance the taste.
- Use warm water when making dough, no more than 110°F.
- Keep the dough in a warm area, or it won’t rise properly.
- Avoid trying to make the pizza rise by adding too much yeast, as this can result in a very sour crust.
- Measure the flour by spooning it into the cup and leveling it with the straight edge of a knife, or even better, use a scale.
- When making pizza, preheat the oven before you start shaping the dough. Once the dough is shaped, add the toppings immediately and place it in the oven. Make sure to prepare the sauce and toppings before you start shaping the pizza dough.
- Do not use a rolling pin to shape this pizza or you’ll knock out all the air.
- For a crispy crust, it’s best to bake above 500°F, or you can par-bake as mentioned above. Using a pizza stone or a pan with holes can also help make the crust more crispy.
- If you want to crisp the crust after the pizza is already made, place it on a hot skillet for 2-4 minutes.
- If using a pizza stone, make sure to preheat it for 30 minutes to 1 hour at 475°F or higher.
- If you can get your hands on bread flour, use that instead of all-purpose flour. It can absorb more liquid, making the dough handling much easier.
- Don’t hesitate to use dry flour on the work surface for dusting; you need it to make high-hydration dough work.
- Use parchment paper to avoid the dough sticking to the pizza steel. Transfer the shaped pizza dough with the parchment paper to the pizza stone.
- Place a skillet over the stove on medium-high heat.
- First, heat the pizza in the microwave for 30-60 seconds or longer depending on whether the pizza is stored on the counter or in the refrigerator.
- Then place the pizza on the hot skillet to crisp the crust.
- Alternatively, you can reheat the pizza in the oven.
Nutrition
Nutrition information is calculated automatically and should be used only as an approximation.
Read our full nutrition disclosure