Learn how to cook basmati rice so that it comes out perfect every single time. This is an easy guide that solves the issue of the basmati rice-to-water ratio, cooking time, rinse/soak, cooking methods, rice cooking at higher altitudes, and other questions you might have.
When cooking basmati rice, we’re looking for those long, fluffy grains that are separate and not sticking to each other, and at the same time, are perfectly cooked. Before moving on to cooking methods, let’s address some common issues when it comes to cooking basmati rice.
Methods to cook rice: Absorption vs. Drain
In the absorption method, rice is cooked with just enough water. All the water will be absorbed, and you will get nice fluffy rice. The drain method (sometimes referred to as the pasta method) includes cooking rice with an excess of water, and then, when the rice is cooked, the excess water is drained off.
Which one should you choose?
It’s just your personal preference which is easier for you to follow, but the drain method can be more beneficial than the absorption method:
- If you are a beginner and are not comfortable with the absorption method.
- If you live at a higher altitude, the drain method can be easier to follow.
- If you are concerned about arsenic in your rice, cooking in excess water may help in removing some of it. For more details, you can look at this article on cooking rice in different water ratios.
Rinsing or soaking rice: Yes or No?
Whether you need to rinse your rice or not entirely depends on your personal preference, the type of rice you are cooking, where you are getting your rice from, and how it is packaged.
For my peace of mind, I always rinse my rice to remove any contaminants, not just starch.
Soaking rice is completely optional as well. It is often thought that soaking will remove all the excess starch, but I haven’t seen much of a difference in the result when soaking my rice or not, so for me, it’s not a necessary step.
Rice to water ratio
The main thing when cooking basmati rice, or any type of rice, is getting the ratio of water to rice correct, especially for the absorption method, which can dramatically affect the outcome. Too much water can lead to soggy and mushy rice, but too little water can lead to uncooked rice.
Here is what I follow for the absorption method:
- If you’re not rinsing your rice, use a ratio of 1 part rice to 1.5 parts water.
- If you’re only rinsing your rice (make sure to remove all the excess water by putting your rice in a strainer), use 1 part rice and 1.5 parts water, but remove one tablespoon of water. I recommend this because it’s just easier in daily life to remove a tablespoon instead of calculating cups in decimals.
- If you’re soaking your rice, take 1 part of rice and 1.5 parts water but remove two tablespoons of water.
For the drain method, use 4-6 times of water, ideally 6 times, which means 1 cup of rice and 6 cups of water.
Cooking time
For the drain method, most of the time, your rice will be cooked in 5-7 minutes.
For the absorption method, increase the cooking time by a minute as you increase the number of cups:
- ½ cup rice – approximately 10 minutes
- 1 cup rice – approximately 11 minutes, add one minute for every additional cup of uncooked rice.
With the absorption method, make sure to rest the rice for 10 minutes after cooking, and do not lift the lid to prevent steam from escaping.
Cooking equipment
The ratio for the absorption method mentioned above works best when you have a cooking saucepan with a tight-fitting lid. If the lid is not tight-fitting and the steam keeps escaping, then this amount of water will be less. In that case, I would use more water.
Another thing to keep in mind is that you should not use narrow and tall vessels to cook a large amount of rice, because the rice at the bottom will become soggy and mushy. Similarly, please do not use a very wide pan for a small amount of rice, or it may get burnt.
Uncooked to cooked basmati rice ratio
As a general rule, one cup of uncooked rice yields about 3 cups of cooked rice.
For basmati rice, one cup of uncooked rice typically gives more than 3 cups, usually close to 3.5 cups. This can vary depending on the specific brand you are using.
How much rice per person?
The amount of rice per person can vary depending on what you are serving with it. For basmati rice, 1 cup of uncooked rice can serve three people, providing more than 1 cup of cooked rice per person.
Ingredients
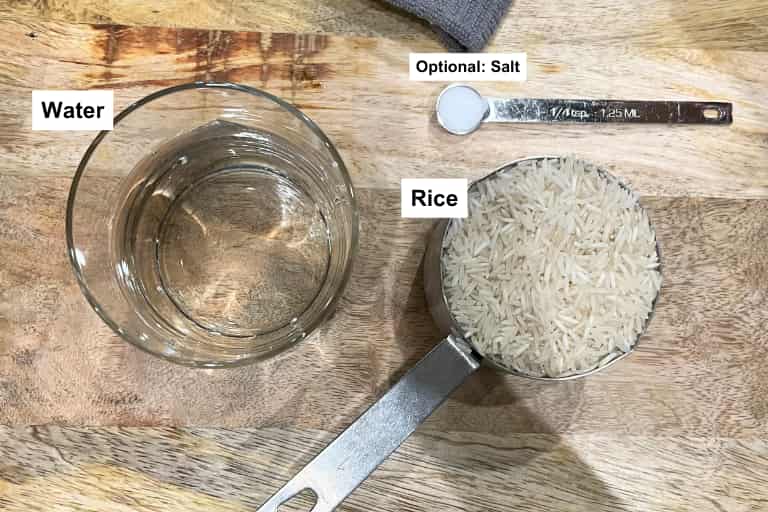
- Basmati rice: 1 cup (I’m using Royal basmati rice, which you can easily get from Walmart, Sam’s Club, and many other stores in the US.)
- Water: 1.5 cups – 1 tablespoon (I’m rinsing my rice, so I will remove one tablespoon from one and a half cups of water.)
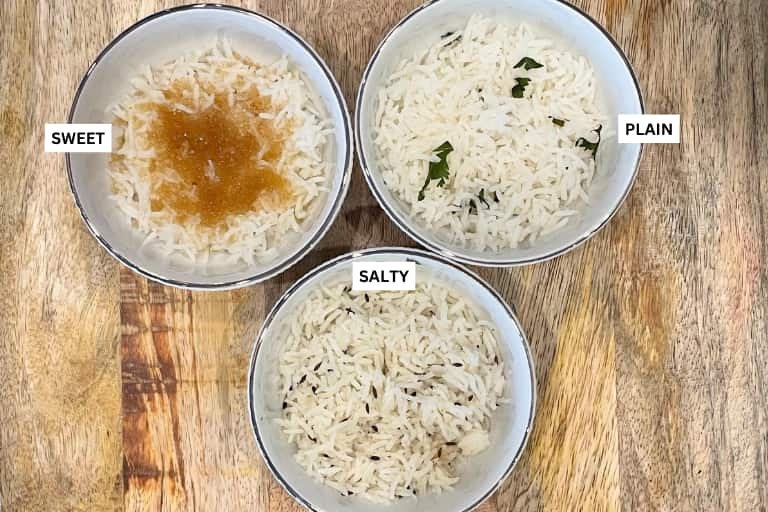
- Salt (optional: not used in this recipe): Salt is completely optional. I do not cook my basmati rice with salt. I like to keep it plain so that I can use it in any variation, either sweet or salty. If you do add salt, for one cup of rice, 1/4 teaspoon of salt will make it slightly salty, while 1/2 teaspoon of salt will make it salty enough so that you can even eat the rice by itself. If cooking with the drain method, add one tablespoon of salt.
- Whole spices (optional: not used in this recipe): If you want the aroma of whole spices in your rice, you can use them. Bay leaf, star anise, cinnamon, cloves, and green cardamom are some of the common ones. I prefer cooking them plain and then adding tadka/ tempering per my needs.
Step-by-Step: Absorption method
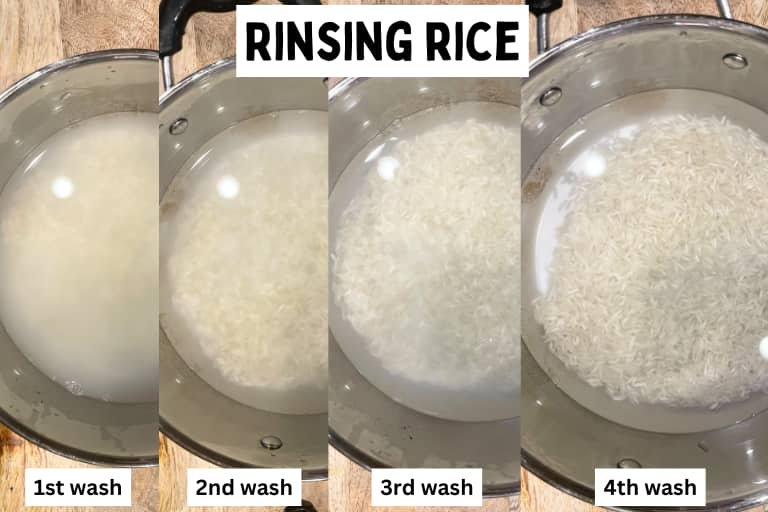
Step 1: Rinse the rice
As mentioned before, rinsing the rice is entirely up to you. I rinse my rice around four times. The first time, your water will be very cloudy, but as you wash it, it will become less cloudy.
However, the cloudiness never completely disappears, so I usually do not go by the rule that you have to wash your rice until the water runs clear because it never runs completely clear.
Step 2 (Optional): Soak the rice
Soaking rice before cooking is optional. If you choose to soak it, remove two tablespoons of water from the 1:1.5 ratio of rice to water (because the grains will absorb water).
Step 3: Strain rice
After rinsing or soaking, remove excess water with a strainer that has fine holes so that you do not lose any rice grains.

Step 3: Cooking the rice
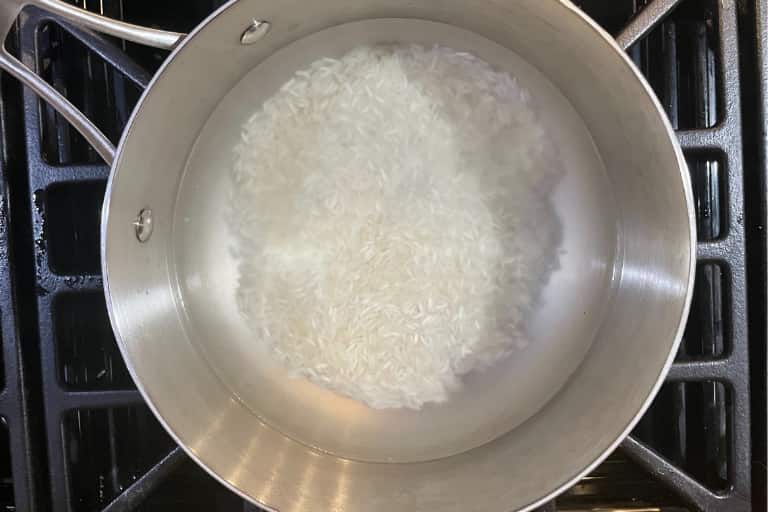
In a saucepan, add the rinsed rice and water. If you want to add salt or spices, you can add it at this step. Turn the heat on high and give a gentle stir.
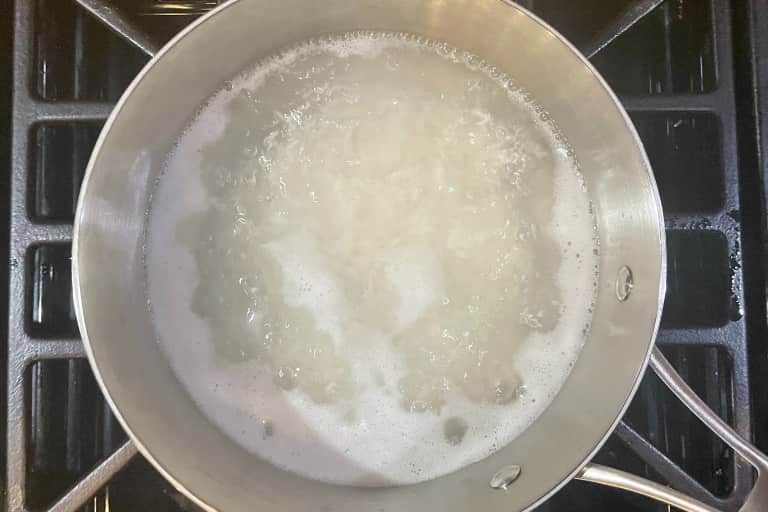
In a few minutes, the water starts boiling. You do not need a rolling boil; you need to see some gentle bubbles along the edges of the pan. Once you see that, cover your rice with a lid and put the heat on the lowest setting.
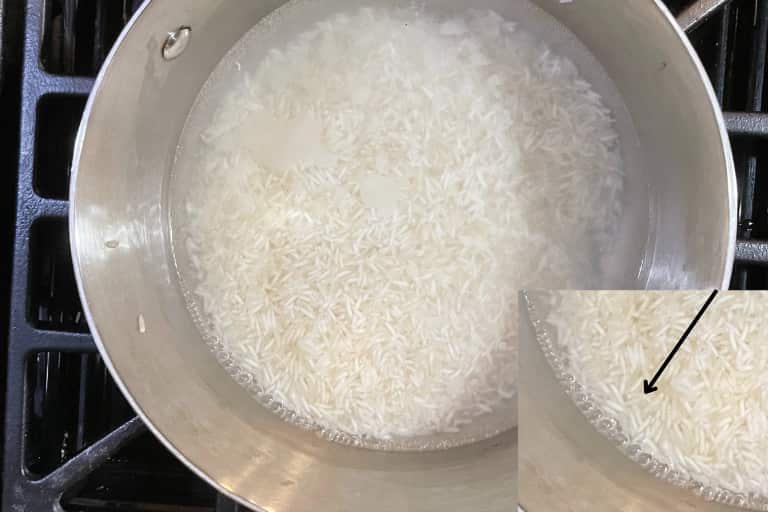
Note the time when you put the lid on and cook for 11 minutes with the lid on. Do not remove the lid during this time, as it lets the steam escape.

Step 4: Rest the rice
After 11 minutes, turn off the heat and let the rice sit undisturbed for 10 minutes.
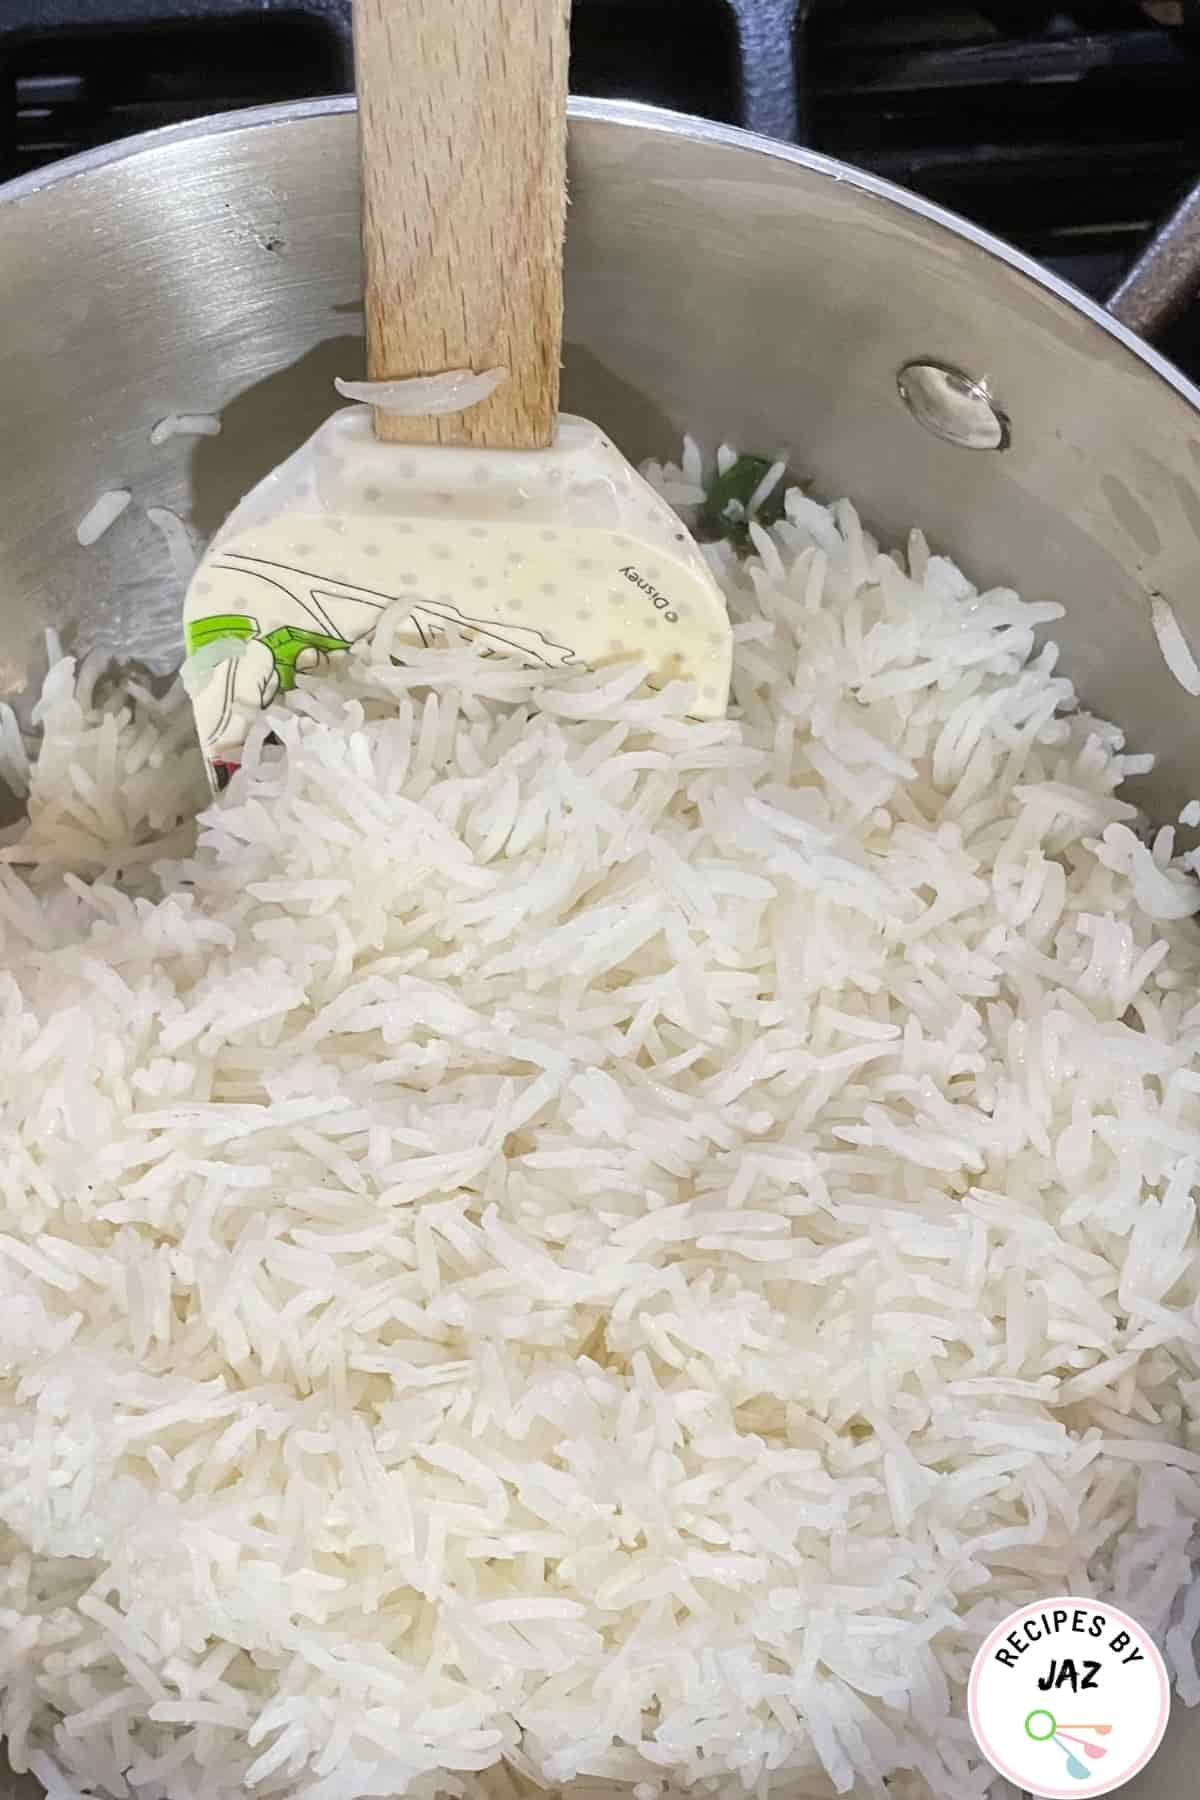
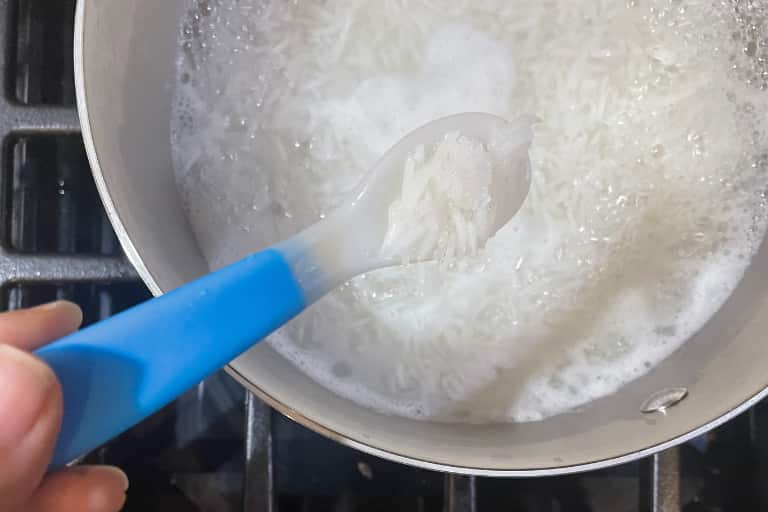
Step 5: Fluff
After the resting time, use a soft spatula to fluff the rice. I use a silicon-based spatula or a silicon-based fork to fluff the rice. They’re very gentle on the rice and do not break it.
Fluffing is important to separate the grains and it also helps release any remaining steam which is trapped between the grains, ensuring the grains do not become sticky and stay separated.

Step-by-Step: Drain method (aka Pasta method)
If you are rinsing or soaking rice, see steps 1 and 2 of the absorption method above.
Step 1: Add water
Take 6 cups of water in a pot and put it on high heat. Let it come to a boil.

Step 2: Add rice
Add one cup of rice (for safety, put the heat on lower setting while adding rice).
Step 3: Bring to a boil
Turn the heat back up to high and let the rice and water come to a full boil.
Step 4: Reduce heat
Once it is on a rolling boil, turn the heat to medium-high and cook for 5-7 minutes. Check your rice at the 4-minute mark to make sure it doesn’t get overcooked (especially if you had pre-soaked the rice).
To check the rice for doneness, taste a few grains instead of just crushing them between your fingers.
Step 5: Strain and fluff
Once cooked, turn the heat off and strain the rice, removing all excess water. Then spread the rice on a wide tray so that the excess moisture evaporates.

How to serve
Once the rice is ready, you can serve it either as it is with lentils, curry, or gravy, or you can modify it as you want. The versatility of cooking basmati rice without salt is that you can use it in any way.
You can make a quick sweet dish from cooked basmati rice by adding some sugar (like this hot buttered sweet rice) or you can add a tadka/temper of cumin seeds to make cumin or jeera rice.
How to cook basmati rice at higher altitudes
Below are the options to cook basmati rice more efficiently at higher altitudes:
Absorption method
Water boils at a lower temperature at high altitudes, so you will need a longer time to cook your rice. Add 1 minute of cooking time and one tablespoon of water for every 1,000 ft above sea level.
Please note that these are only approximations; the actual adjustments might have to be fine-tuned, so it’s best to experiment and see what works best for you.
Drain method
Compared to the absorption method, the drain method can be a more efficient way to cook rice at high altitudes, as it allows you to check the rice for doneness.
Use the same amount of water and rice as you would at sea level. It will take longer to cook rice at a higher altitude compared to the 5-7 minutes at sea level. Follow the same rule of adding one minute of cooking time per 1,000 ft above sea level.
Use a pressure cooker or instant pot
Many pressure cookers and Instant Pots come with directions to make adjustments for cooking at high altitudes. However, if yours did not come with such instructions, you might need to add additional minutes to the cooking time.
Common problems and solutions
Mushy rice
- This can be caused by a saucepan that is too narrow or excess water.
- Solution: To avoid further cooking of rice by steam, immediately spread the rice on a wide tray. Avoid fluffing mushy rice in the saucepan itself.
Undercooked rice
- This can be due to not enough water or a lid that is not tight-fitting.
- Solution: Add around two to four tablespoons of hot water and cook on low heat for an additional 2-3 minutes with the lid. Then let it rest for 5 minutes.
Rice burnt at the base and undercooked
- This can be due to less water, a big pot with little rice, or heat that is too high.
- Solution: Do not try to remove the rice that is stuck at the base. Gently remove the rice from the upper layer into a separate bowl. Sometimes the rice at the base is so burned that there will be a burnt taste to the whole rice, in which case not much can be done.
No measuring cups
- You don’t necessarily need measuring cups to cook rice (although it is a good idea to have them for other recipes). You just need the correct ratio, which is one part rice to one and a half parts water. Then use a medium-sized spoon to remove water depending on whether you rinsed or soaked the rice.
How to store, freeze, and reheat basmati rice
Storage: You can store basmati rice in an airtight container for up to 4 days in the refrigerator. Make sure to cool down the rice (which takes around 20 minutes) before storing it.
Freezing: To freeze the rice, put it in individual freezer-safe containers depending on your needs. Make sure to use a tight lid. For best results, store it for up to 1 month; after that, it starts to lose flavor.
Reheating: You can easily reheat basmati rice in a microwave. Sprinkle some water on top to rehydrate the grains. Make sure to loosely cover the rice while reheating.
Reheat a cup of rice for 30 seconds if the rice is at room temperature. Reheat on high for a minute if refrigerated and around 2-3 minutes if frozen, making sure to fluff every 30-45 seconds.
Note: Reheat only the amount of rice you will be using. Do not store reheated rice again, it’s best to discard any leftovers of reheated rice.

Basmatic Rice (Perfect every time)
Video

Ingredients
For absorption method
- 1 cup basmati rice
- 1.4375 cups water (1.5 cups – 1 tablespoon) (See note 5)
For drain method
- 1 cup basmati rice
- 6 cups water
Optional (not used in this recipe): Salt and spices
- 1 star anise
- 2 green cardomoms (partially opened)
- 1 inch cinnamon stick
- 1 bay leaf
- 1-2 cloves
- 1 teaspoon cumin (I prefer making cumin rice separately)
- Salt (1 tablespoon per cup of rice for drain method and ¼ to ½ teaspoon per cup for absorption method)
Instructions
Washing the Rice
- Whether or not to rinse the rice is a personal choice and can depend on the type of rice, the dish you're preparing, and your personal preference. I usually rinse my rice about four times. Initially, the water will appear very cloudy, but it will gradually clear up as you continue to rinse. However, the water never becomes completely clear, so I don't adhere strictly to the rule that the rice must be washed until the water is clear. Typically, the water becomes sufficiently clear after about three rinses.
Pre-soaking the Rice (Optional)
- Soaking the basmati rice before cooking is an optional step. If you soak the rice, remember to reduce the water in the 1:1.5 rice-to-water ratio by two tablespoons.
Cooking the Rice: Absorption method
- Add the washed rice and water to a saucepan. Turn the heat to high. If you wish to add salt or whole spices, this is the time to do so.
- Soon, the water will begin to boil. You're looking for a gentle boil, with some bubbles forming around the edges of the pan. Once you see this, cover the rice with a lid and reduce the heat to the lowest setting.
- Note the time when you put the lid on and let the rice cook for 11 minutes without removing the lid. The tight-fitting lid is crucial as it traps the steam, which is necessary for the rice to cook properly.
- After 11 minutes, turn off the heat and let the rice to sit undisturbed (do not remove the lid) for 10 minutes.
- Once the resting time is over, remove the lid and gently fluff the rice with a soft spatula. I prefer using a silicon-based spatula or my kids' silicon-based fork to fluff the rice, as they are gentle and do not break the grains. Fluffing is essential to separate the grains and release any trapped steam, ensuring the rice remains non-sticky and the grains stay separate.
Cooking the Rice: Drain method
- Take 6 cups of water in a pot and put it on high heat. Let it come to a boil.
- Follow by adding the rice (for safety, you can lower the heat while adding rice).
- Turn the heat back up to high and let the rice and water come to a full boil.
- Once it is on a rolling boil, turn the heat to medium-high and cook for 5-7 minutes (may vary depending on the type used and brand). There is no need to cover with a tight fitting lid. (Note: If cooking rice for biryani, follow the instructions of the recipe you are making.)
- Check your rice for doneness (preferably taste a few grains instead of crushing the grains between your fingers) at the 4-minute mark to make sure it doesn’t get overcooked (especially if the rice was pre-soaked).
- Once cooked, turn the heat off and strain the rice, removing all excess water.
- Then spread the rice on a wide tray for excess moisture to evaporate.
Serving Rice
- Basmati rice can be served, either plain with lentils or curries or can be modified to your liking. The beauty of cooking basmati rice without salt is its versatility. You can quickly turn it into a sweet dish, or you can add a tempering of cumin seeds to make cumin or jeera rice.
Notes
- If you’re not rinsing your rice, use a ratio of one part rice to 1.5 parts water.
- If you’re only rinsing your rice, use one part rice and 1.5 parts water, then remove one tablespoon of water.
- If you’re soaking your rice, take one part rice and 1.5 parts water but remove two tablespoons of water.
- For the absorption method, add a minute of cooking time and a tablespoon of water for every 1,000 ft above sea level.
- The drain method may be more efficient for cooking rice at higher altitudes. You may need to increase the cooking time by a minute for every 1,000 ft above sea level.
Nutrition
Nutrition information is calculated automatically and should be used only as an approximation.
Read our full nutrition disclosure